Make your own Barefoot Running Sandals
Running sandals have made a name and enjoys a separate customer base from recreational runners to some semi-professional runners. The running sandals have made more mark in the trail running with and aspect of being close to the nature/earth.
The revolution all started when Christopher mcdougall wrote Born to Run and introduced the whole world to the Great Running tribe ‘Tarahumara’ tribe. There are various articles present on them and runners world has quite an exciting account on them. The tribe people would wear an handmade sandals(chappals) which had sole from tyres and just laces for tying it to the foot. This tribe can run 200-300kms in a day easily and not get tired. To cut short, these introduced the barefoot revolution and many companies took a route of manufacturing designed barefoot sandals.
Disclaimer :Bare foot running or running in sandals is normal by people not because of any philosophical reasoning, its just not having enough to spend on Shoes. Its a debatable topic how it has been glamourised now days.
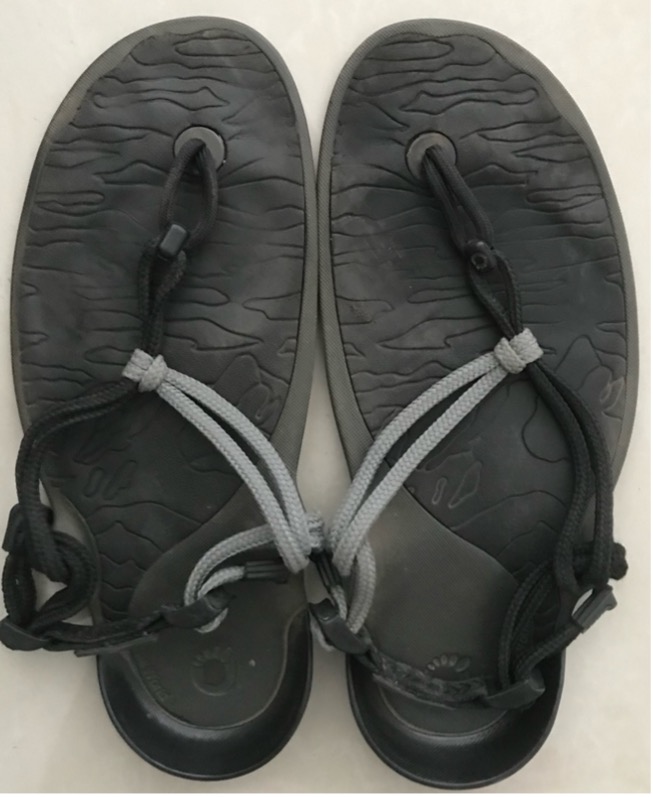
Lunda sandals, Xero shoes , Shama sandals, bedrock and few more which are quite costly in itself.
I myself have owned sandals from Xero shoes.
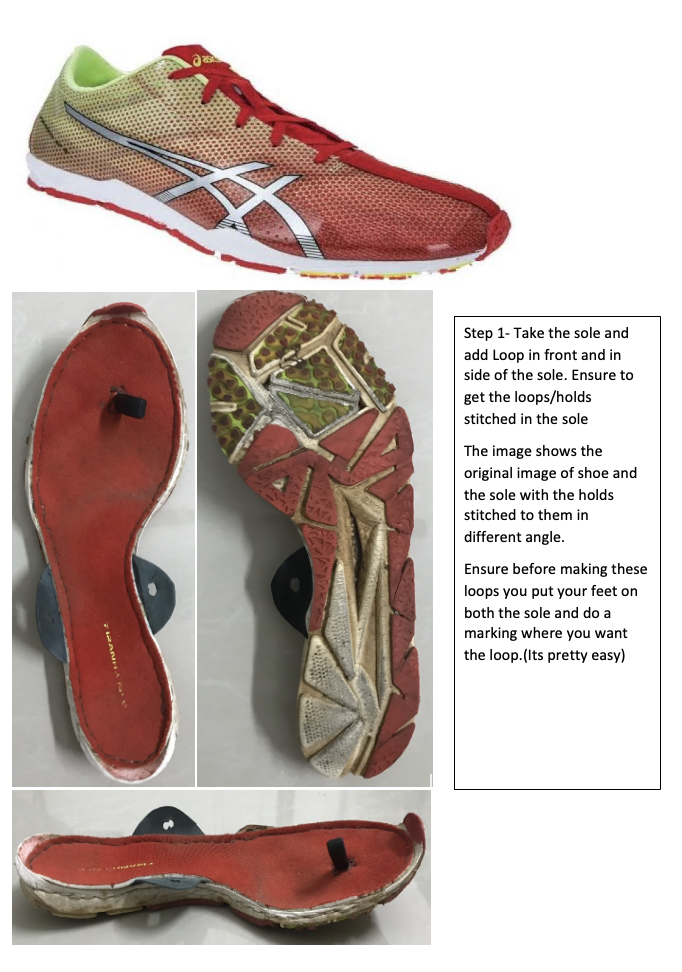
As much as I have enjoyed these barefoot sandals, I never really enjoyed runs in them. However, I do like the idea of having an easy to wear running sandal. Hence I decided to make one for myself. I was having Racing flat shoes Asics Piranha Sp5 meant for fast 5k and 10k races. In last 7 years of using the shoe the upper material of the shoe has given up. I decided to convert them to a running sandal.
Below are the instructions with images.
Step 2- Take a long shoe lace or a parachord or just good quality think rope. Make a loop in t center of the rope and insert in front hold. Pass the open ends of rope from this loop and pull it.
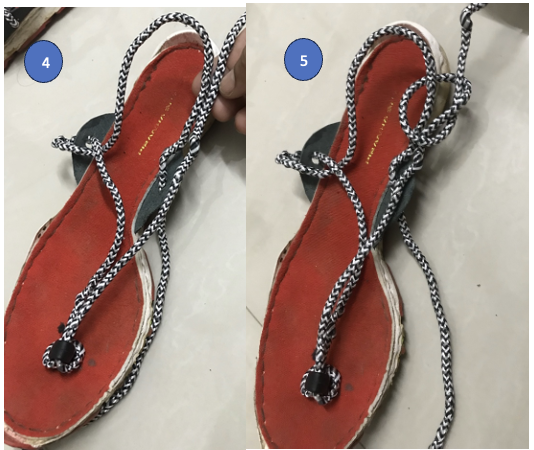
Step 3- Insert one end of the rope into side hold of the outer curve of the sole as shown in image 4 below
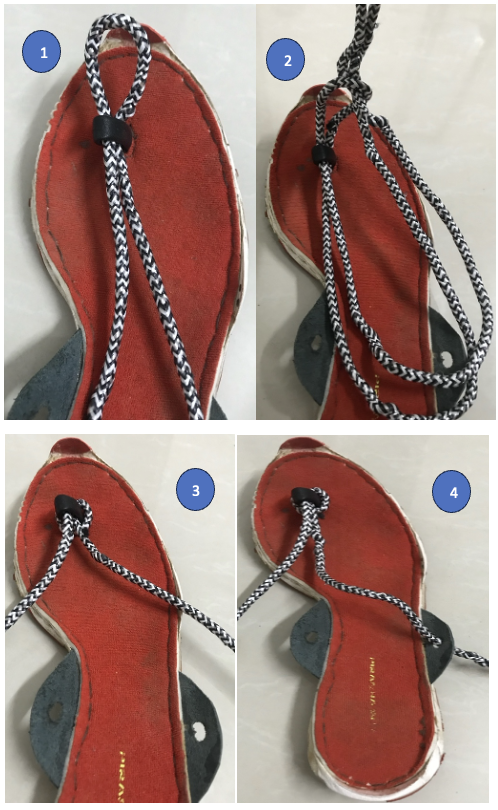
Step 4- Take the End of the same rope and bring it under the top of the rope as shown.

Step 5- Take the same end and pass it through the other side hold.
Step 6- Now take the other open end, keeping it in parallel with the rope which has been passed through the hold , tie a knot to the passed rope. Use Slip knot/slid knot/Safety knot. This type of knot allows you to tighten or loosen the whole lacing system.
Step 7- Bring the other end and pass it as shown below. Now with two open ends of the rope , tie them to the nearest rope in the lacing system as shown.
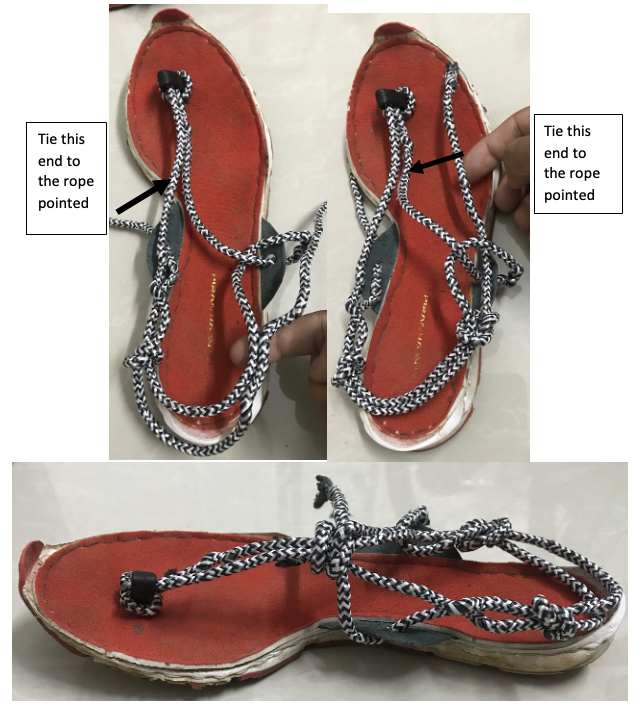
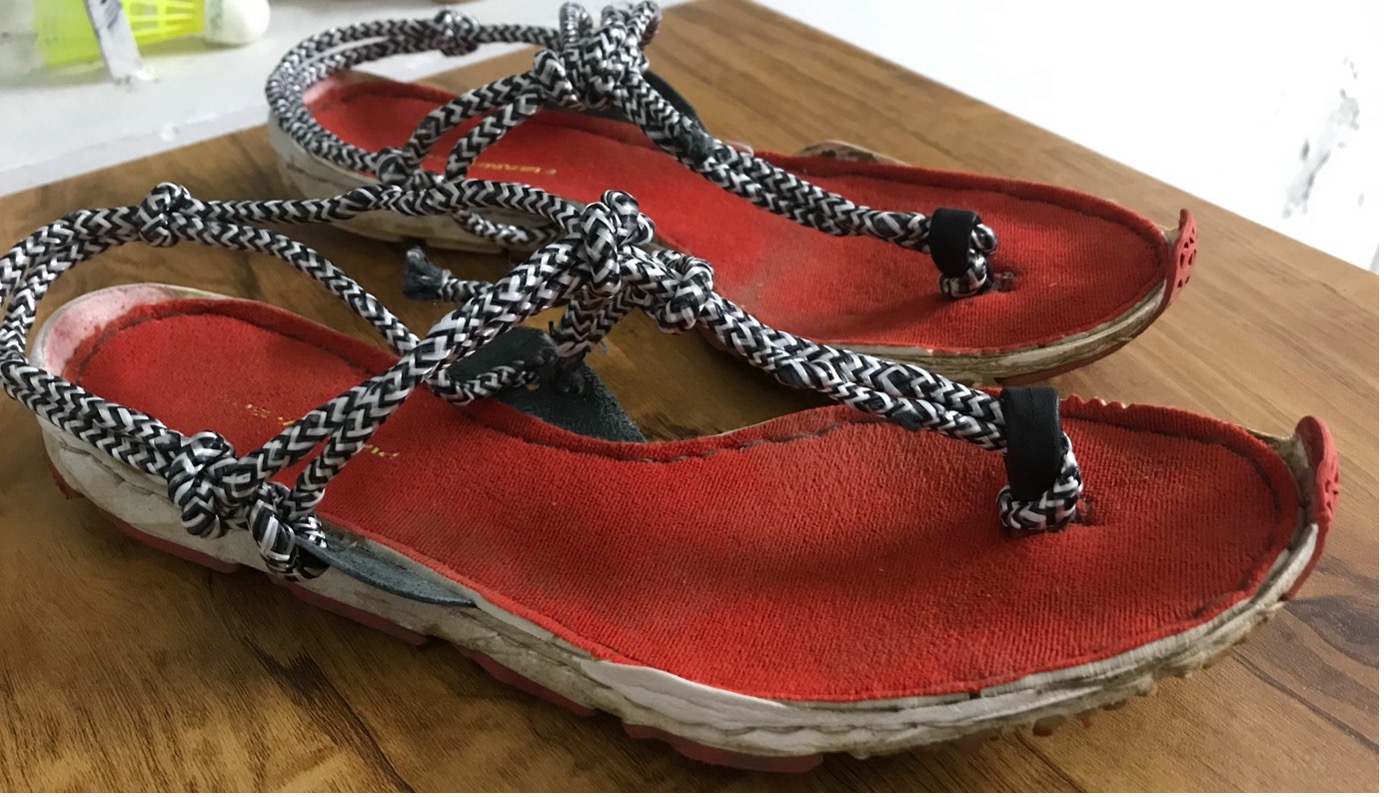
Final Result.
